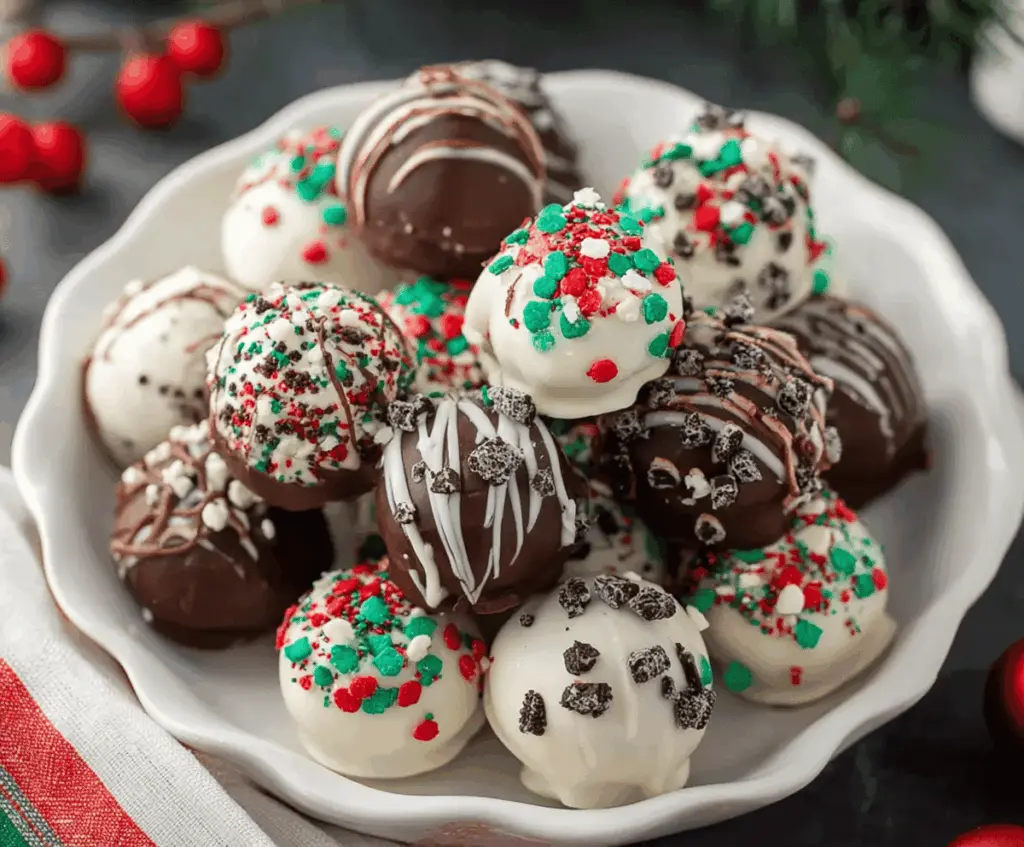
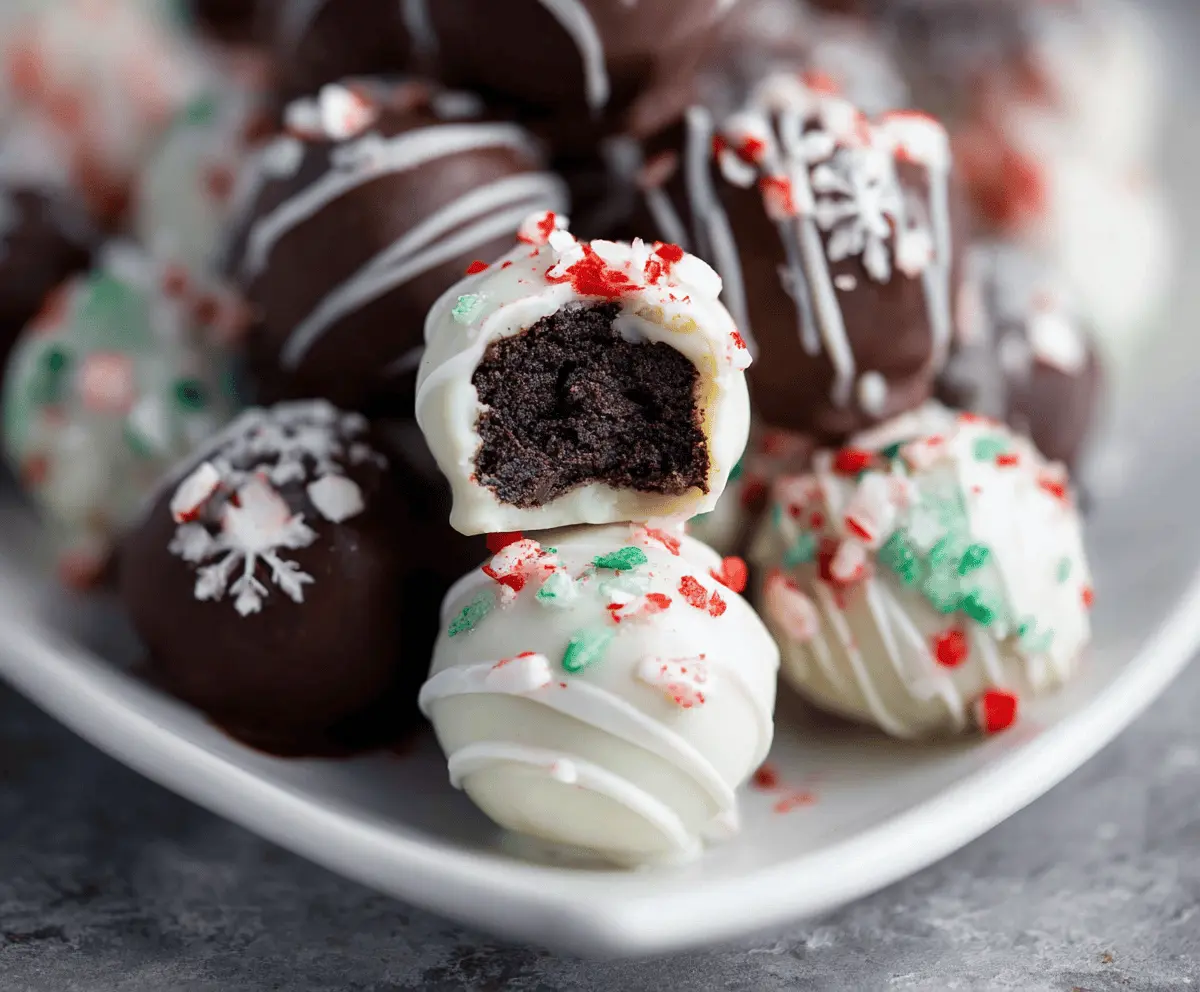
Christmas Oreo Balls are little bites of holiday joy made with crushed Oreos mixed into a creamy filling and coated in festive colored chocolate. These treats are both crunchy and smooth, with a perfect balance of chocolatey sweetness that instantly feels like a celebration in your mouth.
I love making these around the holidays because they’re so simple and fun to decorate. Adding red, green, and white chocolate or sprinkles really makes them feel festive, and everyone always asks for the recipe after trying them. Plus, they only take a few ingredients and come together quickly—great for last-minute holiday treats!
My favorite way to enjoy Christmas Oreo Balls is with a cup of hot cocoa while sitting by the fireplace. They also make fantastic gifts when wrapped up in little bags or boxes, and they never fail to bring a smile to family and friends. These little balls of goodness definitely add a sweet touch to holiday gatherings!
Key Ingredients & Substitutions
Oreos: The crushed Oreos give these balls their classic chocolate cookie crunch. If you prefer gluten-free, look for gluten-free sandwich cookies or use chocolate graham crackers instead.
Cream Cheese: This binds the Oreo crumbs into a creamy filling. For a lighter option, try reduced-fat cream cheese or a dairy-free alternative like cashew cream.
Chocolate Coatings: White and dark chocolate candy melts work great here. You can swap candy melts with good-quality melting chocolate bars or chips. For a different flavor, try colored melts or milk chocolate.
Sprinkles & Garnishes: Festive sprinkles add a cheerful touch. You can substitute with crushed nuts, mini chocolate chips, or edible glitter to match any holiday theme.
How Can You Make Perfect Round Balls Without a Mess?
Rolling Oreo balls evenly is key for a nice finish. Here’s how to do it easily:
- Chill the Oreos and cream cheese mixture in the fridge for 30 minutes before rolling. This firms it up and reduces stickiness.
- Use a cookie scoop or tablespoon to portion the dough for uniform balls.
- Roll gently between your palms—too much pressure can warm the mixture and make it sticky.
- If the mixture becomes too soft, pop it back in the fridge for a few minutes before continuing.
These steps will help your balls keep their shape and make dipping in chocolate much easier!
Equipment You’ll Need
- Food processor or plastic bag and rolling pin – I find a food processor easiest for quick, even crumbs, but a rolling pin works too.
- Mixing bowls – for blending the Oreo crumbs and cream cheese.
- Baking sheet with parchment paper – helps the balls stop sticking and makes cleanup easier.
- Microwave-safe bowls – for melting white and dark chocolates quickly and smoothly.
- Fork or dipping tools – to coat the balls evenly without mess.
- Decorating utensils and sprinkles – for festive touches and finishing decorations.
Flavor Variations & Add-Ins
- Use peppermint or orange candy melts instead of white or milk chocolate for a seasonal twist.
- Add chopped nuts or crushed peppermint candies inside the Oreo mixture for extra texture and flavor.
- Swirl in blueberry or raspberry flavored chocolate before coating for a fruity surprise.
- Use dairy-free or vegan chocolate for a plant-based version that everyone can enjoy.
Christmas Oreo Balls
Ingredients You’ll Need:
For the Oreo Ball Centers:
- 36 Oreo cookies (about 1 package)
- 8 oz (225g) cream cheese, softened
For the Chocolate Coating and Decoration:
- 12 oz (340g) white chocolate or white candy melts
- 12 oz (340g) dark or milk chocolate or chocolate candy melts
- Red, green, and white holiday sprinkles or festive sugar decorations
- Crushed Oreo pieces for garnish (optional)
How Much Time Will You Need?
This recipe takes about 15 minutes to prepare, plus at least 30 minutes chilling time to firm up the balls before dipping. Adding time to let the chocolate coatings set will take another 15-20 minutes. Overall, plan for around 1 hour to complete and enjoy your festive treats!
Step-by-Step Instructions:
1. Make the Oreo Mixture:
Start by crushing the Oreo cookies into fine crumbs. The easiest way is with a food processor, but you can also place them in a sealed plastic bag and crush using a rolling pin. Once crushed, combine the crumbs with softened cream cheese in a mixing bowl. Use a spoon or your hands to mix until you have a smooth and sticky dough.
2. Chill and Shape the Oreo Balls:
Line a baking sheet with parchment paper. Roll the Oreo dough into 1-inch balls and place them evenly on the sheet. Refrigerate for at least 30 minutes to help them hold their shape for dipping.
3. Melt the Chocolates:
While the balls chill, melt the white chocolate in a microwave-safe bowl by heating in 30-second intervals, stirring in between until smooth. Repeat this process with the dark or milk chocolate in a separate bowl.
4. Coat and Decorate:
Using a fork or dipping tool, dip half of the Oreo balls into the white chocolate until fully coated. Place them back on the parchment and immediately add red and green sprinkles for a festive look. Then, dip the remaining balls into the dark or milk chocolate. Place them back, drizzle with some white chocolate, and sprinkle with crushed Oreos or other decorations if you like.
5. Let the Coatings Set:
Allow the chocolate coatings to harden completely by letting the balls sit at room temperature or placing them in the fridge for faster setting.
6. Serve and Store:
Once firm, arrange your Christmas Oreo Balls on a festive platter to enjoy! Store any leftovers in an airtight container in the refrigerator to keep them fresh.
Can I Use Gluten-Free Oreos to Make These Oreo Balls?
Yes! Just swap regular Oreos for your favorite gluten-free sandwich cookies. The texture may vary slightly, but they’ll still taste delicious.
How Do I Store Christmas Oreo Balls?
Store them in an airtight container in the refrigerator for up to one week. Let them come to room temperature for a few minutes before serving for the best flavor.
Can I Make Oreo Balls Ahead of Time?
Absolutely! You can prepare and shape the Oreo balls a day or two in advance. Keep them refrigerated, then dip and decorate just before serving to keep the chocolate coating fresh.
What’s the Best Way to Melt Chocolate for Dipping?
Use short bursts of 20-30 seconds in the microwave, stirring well between each interval to prevent burning. Alternatively, melt chocolate gently over a double boiler on the stove.