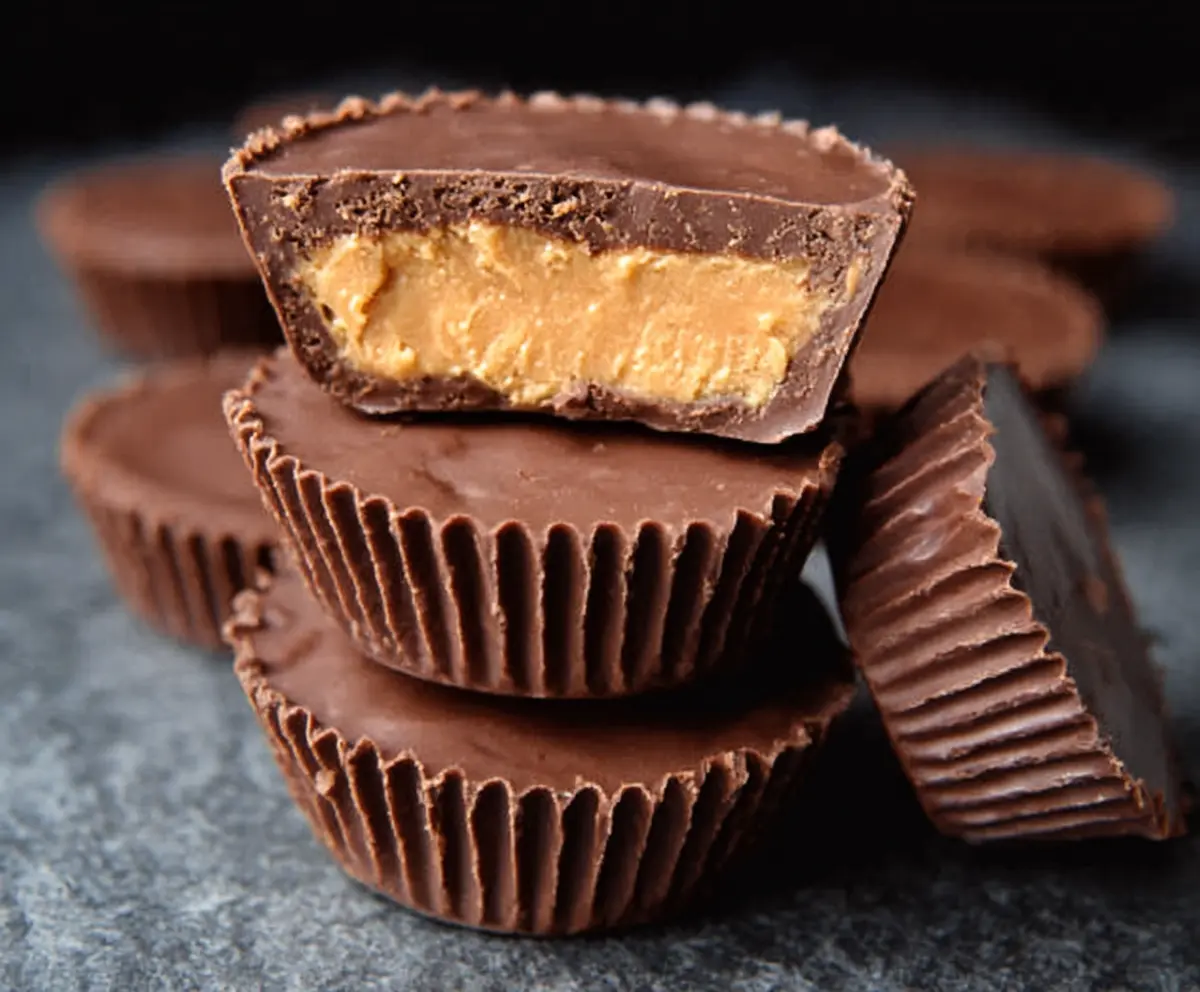
Classic Homemade Reese’s Peanut Butter Cups are a delightful treat that brings together smooth chocolate and creamy peanut butter in the perfect little cup. The rich milk chocolate surrounds a sweet, slightly salty peanut butter filling, giving you that familiar and comforting flavor you probably loved as a kid. These cups are just as delicious as the store-bought ones but with a homemade touch that makes them extra special.
I love making these peanut butter cups because they’re surprisingly simple and fun to put together. I usually like to line a muffin tin with paper cups and carefully spoon in the chocolate and peanut butter layers. It feels a bit like a little chocolate adventure every time! Plus, you can adjust how sweet or salty the peanut butter filling is, which lets me put my own spin on this classic treat.
These homemade peanut butter cups are perfect for sharing at a party or just keeping some in the fridge for a sweet snack whenever a chocolate craving hits. I often keep a batch in the freezer and pull one out when I need a quick pick-me-up—they’re just the right size to satisfy that sweet tooth without going overboard. Everyone who tries them always asks for the recipe, and I’m happy to say they never disappoint!
Key Ingredients & Substitutions
Milk chocolate: This gives the classic sweet and creamy outer shell. If you prefer a less sweet option, try semi-sweet or dark chocolate. Make sure to use good quality chocolate chips or bars for a smooth melt.
Creamy peanut butter: Smooth peanut butter works best for a creamy texture inside. Natural peanut butter can be used, but add a little extra powdered sugar to balance the flavor. Avoid chunky peanut butter as it can affect the smooth filling texture.
Powdered sugar: It sweetens the peanut butter filling and helps it firm up. You can substitute with powdered sugar alternatives like coconut sugar powder if you want a different sweetness.
Butter and vanilla extract: Butter adds richness, and vanilla brings out the nutty flavor. Unsalted butter is best so you control the saltiness.
How Do I Get a Smooth Chocolate Layer Without Cracking?
Melting and tempering the chocolate can feel tricky, but a few key steps help. Use gentle heat and stir often to avoid burning:
- Melt chocolate in short bursts in the microwave and stir after each.
- If using a double boiler, keep the water at a simmer, not a boil, and stir constantly.
- Make sure chocolate is fluid but not too hot before pouring into liners.
- Tap the muffin tin on the counter to remove air bubbles and spread chocolate evenly.
- Chill the bottom layer before adding peanut butter to prevent mixing.
This careful melting and layering keep your cups smooth and help them pop out easily without cracking.
Equipment You’ll Need
- 12-cup muffin tin – I like using this because it helps shape and hold the cups perfectly.
- Paper muffin liners – these make it easy to remove the cups and keep them neat.
- Microwave-safe bowl or double boiler – for melting the chocolate gently and evenly.
- Mixing bowls – to make the peanut butter filling and stir ingredients smoothly.
- Spoon or small spatula – helps spread the chocolate and peanut butter neatly into the liners.
- Measuring cups and spoons – for accurate measurement of ingredients.
Flavor Variations & Add-Ins
- Use dark chocolate, white chocolate, or a mix for different flavor profiles.
- Add a pinch of cinnamon or cayenne pepper in the peanut butter mixture for a spicy kick.
- Mix in crushed pretzels, Rice Krispies, or chopped nuts into the peanut butter for extra crunch.
- Swirl in caramel or drizzle melted chocolate on top for extra sweetness and visual appeal.
Classic Homemade Reese’s Peanut Butter Cups
Ingredients You’ll Need:
For the Chocolate Shell:
- 12 oz (about 2 cups) milk chocolate chips or chopped milk chocolate
- Paper muffin liners (for shaping)
For the Peanut Butter Filling:
- 1 cup creamy peanut butter (smooth, not crunchy)
- 1/4 cup powdered sugar
- 2 tablespoons unsalted butter, softened
- 1/2 teaspoon vanilla extract
- 1/4 teaspoon salt (optional, to enhance peanut butter flavor)
How Much Time Will You Need?
This recipe takes about 15 minutes to prepare, including melting chocolate and mixing the filling. Then, it needs at least 35 minutes to chill in the freezer for the cups to set properly.
Step-by-Step Instructions:
1. Prepare Your Workspace:
Line a 12-cup muffin tin with paper liners and have your ingredients ready. This will make the assembly quick and clean.
2. Melt the Chocolate:
Place the milk chocolate in a microwave-safe bowl and microwave in 20-30 second bursts, stirring well between each, until smooth. You can also melt the chocolate using a double boiler over simmering water. Let the chocolate cool slightly, but don’t let it harden.
3. Make the Peanut Butter Filling:
In a medium bowl, combine the peanut butter, powdered sugar, softened butter, vanilla extract, and salt if using. Stir until the mixture is smooth and creamy.
4. Assemble the Peanut Butter Cups:
Start by spooning about 1 tablespoon of melted chocolate into each paper liner. Gently spread the chocolate up the sides a bit to coat. Tap the pan on the counter to smooth the chocolate layer. Place the muffin tin in the freezer for 5 minutes to set the base.
Once the chocolate has hardened, add about 1 tablespoon of the peanut butter filling into the center of each chocolate base. Shape it into a smooth, rounded layer.
Top each peanut butter filling with about 1 tablespoon of melted chocolate, covering the peanut butter completely. Smooth the tops out evenly.
5. Chill Until Firm:
Return the muffin tin to the freezer and chill for at least 30 minutes, or until the peanut butter cups are fully firm and set.
6. Serve and Store:
Remove the peanut butter cups from their liners and enjoy! Store any leftovers in an airtight container in the refrigerator for up to two weeks, or freeze for longer storage.
Can I Use Natural Peanut Butter Instead of Creamy Peanut Butter?
Yes, you can! Just make sure to stir it well beforehand as natural peanut butter separates. You might want to add a little extra powdered sugar to help balance any extra moisture and sweetness.
How Should I Store Homemade Peanut Butter Cups?
Store them in an airtight container in the refrigerator for up to two weeks. For longer storage, freeze them in a sealed container, and thaw briefly at room temperature before enjoying.
Can I Melt the Chocolate on the Stove Instead of Using a Microwave?
Absolutely! Use a double boiler by placing a heatproof bowl over a pot of simmering water, stirring the chocolate gently until melted. Just avoid letting any water get into the chocolate to keep it smooth.
Can I Make These Peanut Butter Cups Vegan or Dairy-Free?
Yes! Use dairy-free chocolate chips and a dairy-free butter substitute. Just be sure the peanut butter and other ingredients are also dairy-free to keep the cups vegan-friendly.