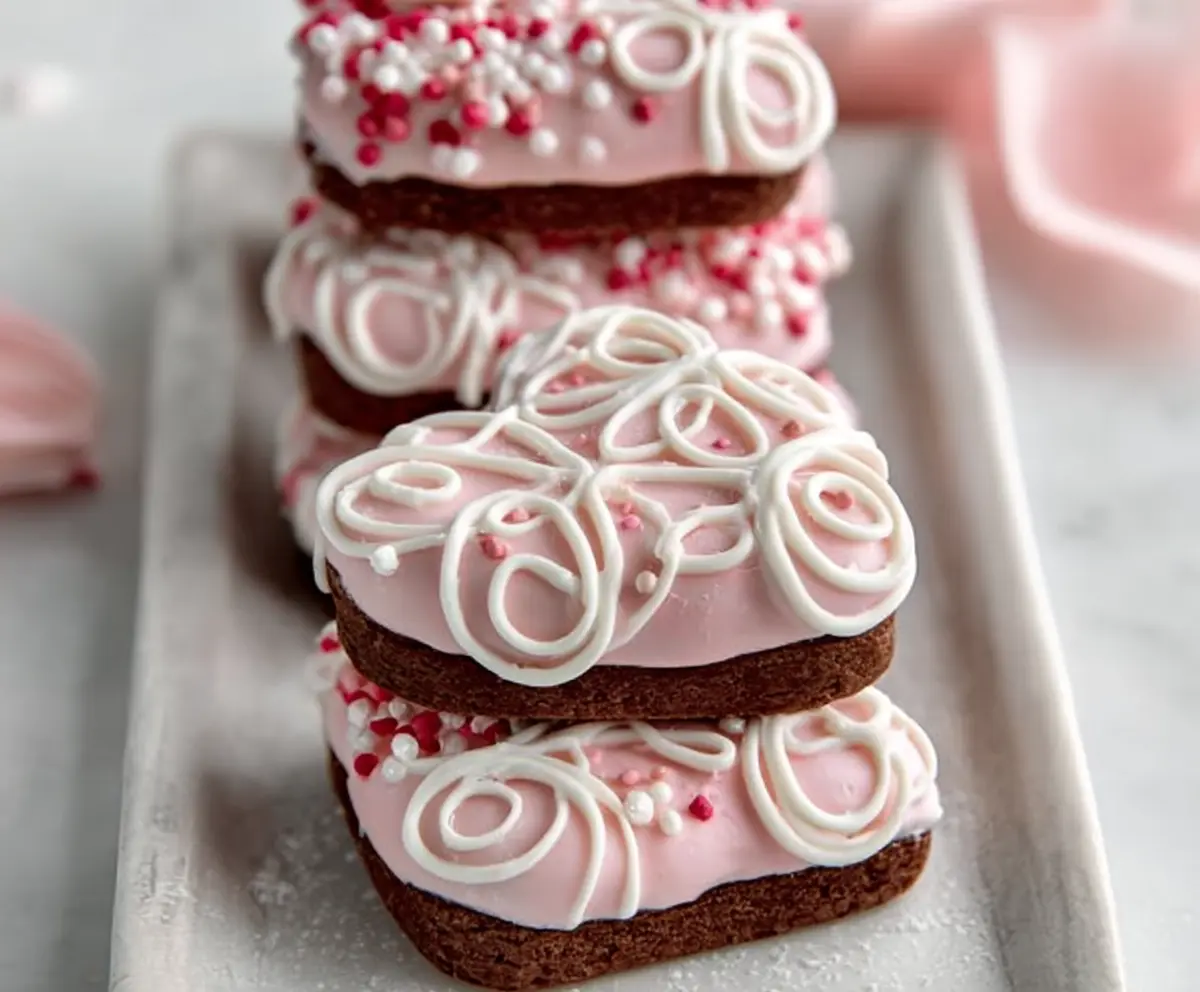
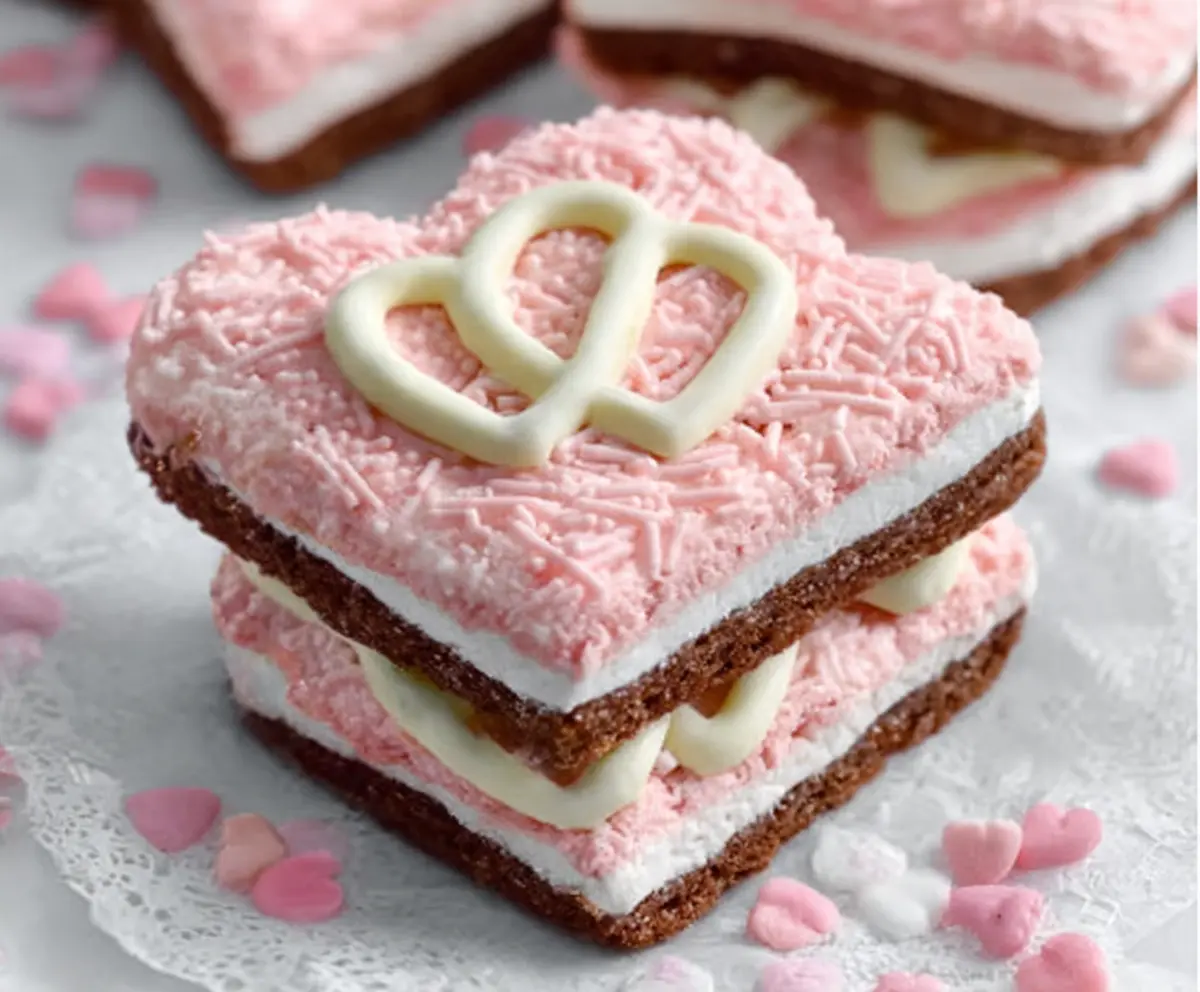
Copycat Little Debbie Valentines Cakes are those little pink and white treats that are just as cute as they are tasty! They have layers of soft, fluffy cake with sweet, creamy frosting in between, all covered in a smooth pink coating decorated with heart sprinkles. These cakes are perfect for sharing a little love anytime, not just on Valentine’s Day.
I love making these at home because you can enjoy them fresh and know exactly what’s inside. The best part is that they aren’t too sweet, so they’re great for a quick snack or a little dessert after dinner. I like to keep a box in the freezer and grab one when I want a small, sweet pick-me-up. Plus, making them yourself is kind of fun and feels like a special little project!
These cakes are perfect with a glass of cold milk or even a warm cup of tea. I often bring them to get-togethers or pack one in my kids’ lunchboxes to brighten their day. It’s amazing how something so small and simple can bring such a smile. If you love the store-bought ones, trying the homemade version might just become your new favorite treat to bake and share!
Key Ingredients & Substitutions
All-purpose flour & cocoa powder: These form the base of the cake, giving it the right texture and chocolate flavor. If you want a gluten-free option, use a gluten-free baking blend instead of flour.
Butter: Butter gives richness and moisture to both cake and filling. You can swap with margarine or a dairy-free butter for vegan needs, but flavor might change slightly.
Buttermilk: Adds tang and keeps the cake tender. If you don’t have buttermilk, mix 1/2 cup milk with 1/2 tablespoon vinegar or lemon juice, let sit 5 minutes before using.
White chocolate melting wafers: These make the pretty pink coating. If you can’t find pink wafers, melt white chocolate and add a few drops of red food coloring to get the shade you like.
Sprinkles: Any small, heart-shaped or round sprinkles work. Choose colors you like or leave them off for a simpler look.
How Do You Pipe Perfect Little Debbie-Style Cakes?
Piping the cake batter helps get that neat, uniform shape. Here’s how to do it smoothly:
- Use a piping bag with a medium round tip, or a small zip-top bag with the corner cut off.
- Pipe the batter onto parchment-lined pan in small rectangles about 3 by 2 inches.
- Try to pipe with steady pressure and move the tip evenly to keep the shape consistent.
- Don’t overfill your piping bag; refill as needed to maintain control.
- If you don’t want to pipe, you can spread batter into a pan and cut shapes after baking, but piping gives that authentic look.
After baking, let the cakes cool fully. The next step is sandwiching and coating, which needs gentle hands to keep everything together nicely. When dipping, use a fork or dipping tool to fully cover the cakes and gently tap off extra coating so it’s smooth and neat.
Equipment You’ll Need
- Mixing bowls – I like using different sizes to keep ingredients organized and make mixing easier.
- Electric mixer – helps beat the butter and sugar until fluffy, saving you time and effort.
- Piping bag and tips – for neatly piping the cake rectangles and the decorative white loops.
- Small spatula or butter knife – useful for spreading filling smoothly onto the cakes.
- Baking sheet lined with parchment paper – keeps the cakes from sticking and makes cleanup simple.
- Microwave-safe bowl – for melting the candy melts or white chocolate coating.
- Fork or dipping tool – helps dip the cakes evenly into the coating without breaking them.
- Cooling rack – to let the cakes cool completely before coating and decorating.
Flavor Variations & Add-Ins
- Chocolate hazelnut spread – swirl inside the filling for a nutty flavor that pairs well with the chocolate cake.
- Strawberry or raspberry jam – spread a thin layer before adding the filling for a fruity twist.
- White chocolate or vanilla coating – use instead of pink candy melts for a more subtle or elegant look.
- Colored sprinkles or edible glitter – choose different colors or sparkle to match special themes or celebrations.
Copycat Little Debbie Valentines Cakes
Ingredients You’ll Need:
For the Cake:
- 1 cup all-purpose flour
- 1/3 cup unsweetened cocoa powder
- 1/2 tsp baking soda
- 1/2 tsp baking powder
- 1/4 tsp salt
- 1/2 cup unsalted butter, softened
- 3/4 cup granulated sugar
- 2 large eggs
- 1 tsp vanilla extract
- 1/2 cup buttermilk
For the Filling:
- 1/2 cup unsalted butter, softened
- 1 1/2 cups powdered sugar
- 1/2 tsp vanilla extract
- 1-2 tbsp milk or heavy cream
For the Pink Coating:
- 2 cups white chocolate melting wafers or pink candy melts
For Decoration:
- 1/2 cup white chocolate or white candy melts, for piping
- Pink, red, and white heart-shaped or round sprinkles
How Much Time Will You Need?
Getting these lovable cakes ready takes about 20 minutes for preparation, 10 minutes baking time, and about 15 minutes for assembly and dipping. Allow extra time for the coating to set, usually 30 minutes to 1 hour depending on your room temperature or if you chill them in the fridge.
Step-by-Step Instructions:
1. Make the Cake:
Preheat the oven to 350°F (175°C) and line a baking sheet with parchment paper. In a medium bowl, whisk together the flour, cocoa powder, baking soda, baking powder, and salt.
In a large bowl, beat the softened butter and sugar until light and fluffy. Add eggs one at a time, mixing well after each. Stir in vanilla extract.
Alternate adding the dry ingredients and buttermilk to the butter mixture, starting and ending with the dry ingredients. Mix until just combined.
Transfer the batter to a piping bag or a zip-top bag with a small corner cut off and pipe small rectangles about 3 inches long and 2 inches wide onto the baking sheet.
Bake for 9–11 minutes or until the cakes spring back lightly when touched. Cool completely on a wire rack.
2. Prepare the Filling and Assemble:
While the cakes cool, beat the softened butter, powdered sugar, vanilla extract, and milk or cream until smooth and fluffy. Spread or pipe a generous amount onto the flat side of one cake, then sandwich with another cake, flat sides facing in.
3. Coat and Decorate:
Melt the pink candy melts or white chocolate wafers according to package instructions. Dip each sandwich cake into the melted coating, making sure it’s fully covered. Use a fork or dipping tool to lift and tap off the excess coating.
Place the coated cakes on parchment paper and immediately decorate with white chocolate piped loops and sprinkle with the colored sprinkles before the coating sets.
Let them set completely at room temperature or in the fridge before serving.
4. Storage:
Store cakes in an airtight container for up to 3 days or freeze for longer freshness.
Enjoy your homemade Valentine’s Day treats that look and taste just like Little Debbie Valentines Cakes!
Can I Use Regular Milk Instead of Buttermilk?
Yes! If you don’t have buttermilk, mix 1/2 cup of regular milk with 1/2 tablespoon of lemon juice or vinegar. Let it sit for 5 minutes before using. This will mimic the tanginess of buttermilk and help keep the cakes tender.
How Do I Store Leftover Valentines Cakes?
Store leftover cakes in an airtight container at room temperature for up to 3 days. For longer storage, freeze them in a sealed container or freezer bag for up to 2 months. Thaw in the fridge before enjoying.
Can I Substitute the Pink Candy Melts?
Absolutely! You can use white chocolate chips or melting wafers and add a few drops of red or pink food coloring to get the perfect Valentine’s pink. Just be sure to use candy melts or chocolate specially designed for melting to ensure smooth coating.
Is It Okay to Make the Cakes Ahead of Time?
Yes, you can bake the cakes a day ahead and store them in an airtight container to keep fresh. Assemble, coat, and decorate them the next day for the best texture and appearance.