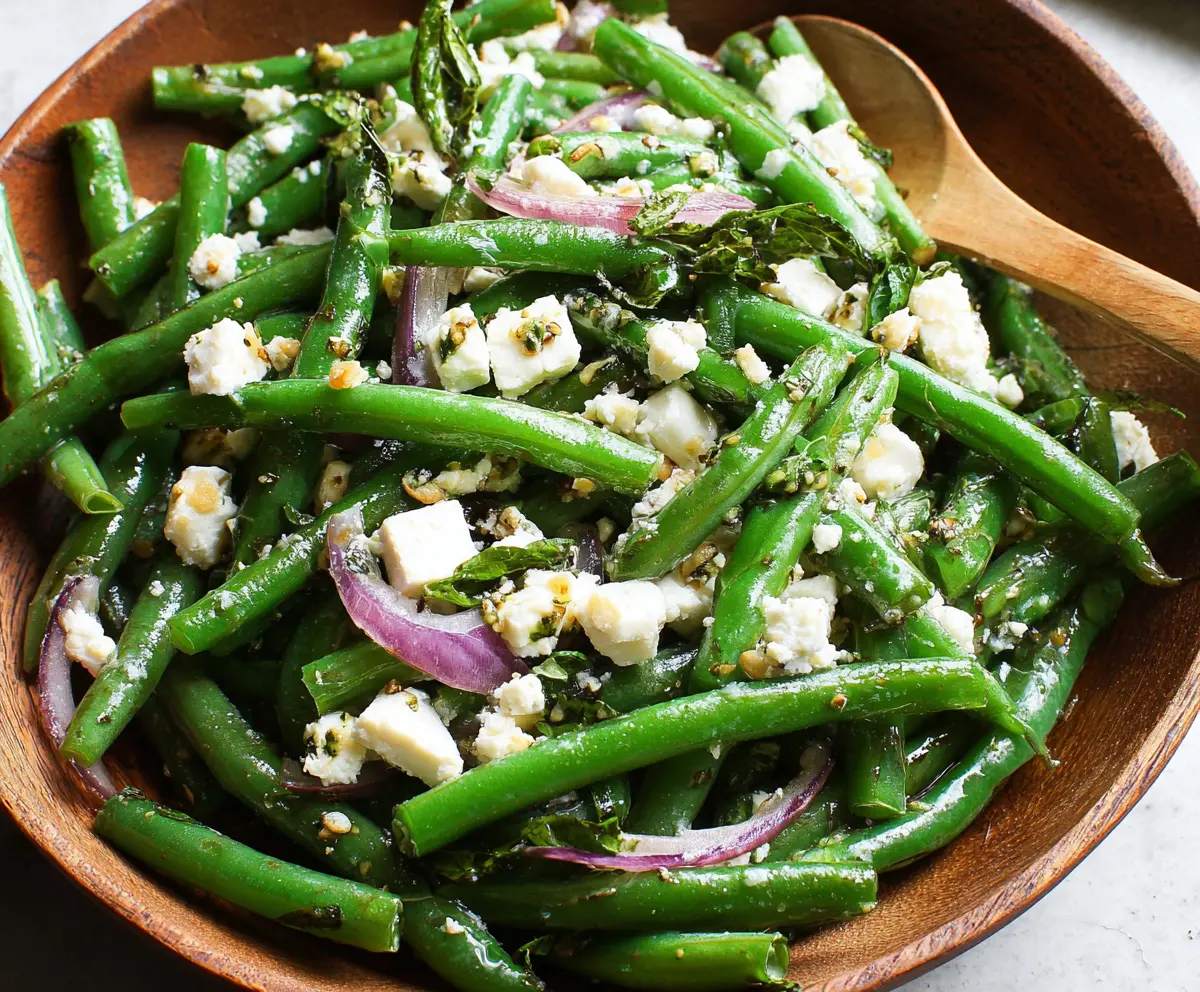
Green Bean and Feta Salad is a fresh and crunchy side that combines tender green beans with salty feta cheese and a light, tangy dressing. It’s a simple, colorful dish that brings together crisp veggies and creamy cheese in a way that just works every time.
I love making this salad when I want something easy but still full of flavor. The saltiness of the feta plays so nicely with the bright green beans, and a little drizzle of olive oil and lemon juice ties it all together. It’s one of those salads that feels both light and satisfying, perfect for warmer days or whenever you want a refreshing bite.
My favorite way to serve it is alongside grilled chicken or fish, but it also shines on its own as a quick lunch or as a crunchy addition to a picnic spread. I always make a little extra because it disappears fast—everyone seems to love this salad’s fresh and zesty vibe!
Key Ingredients & Substitutions
Green Beans: Fresh green beans add wonderful crunch and bright color. If fresh aren’t available, frozen green beans work well too—just thaw and pat dry before using.
Feta Cheese: Feta brings a salty, creamy kick. For a milder option, try goat cheese or ricotta salata. Vegan feta alternatives can work if needed.
Red Onion: Thin slices give a sharp bite and pretty color. You can swap with shallots or green onions for a milder onion flavor.
Fresh Basil: Basil adds fresh herb flavor. If you don’t have basil, fresh parsley or mint make great substitutions. Dried herbs can be used but keep amounts small.
Olive Oil & Lemon Juice: These create a simple, bright dressing. Extra virgin olive oil gives the best flavor, but any mild oil can work. Lime juice can replace lemon for a slightly different tang.
How Do You Keep Green Beans Crisp and Bright?
The trick is to cook green beans just until tender-crisp. Overcooking makes them soft and dulls their color, so time it carefully:
- Boil salted water and cook beans for just 3-4 minutes until bright green and slightly tender.
- Immediately drain and plunge beans into ice water to halt cooking—this keeps them crunchy and vibrant.
- Drain well before mixing with the dressing to avoid soggy salad.
This quick blanch-and-shock method locks in great texture and color, giving your salad a fresh bite every time!
Equipment You’ll Need
- Large pot – I use this to bring water to a boil for cooking the beans quickly and efficiently.
- Colander or strainer – makes it easy to drain the green beans and stop the cooking process with cold water.
- Mixing bowl – perfect for whisking the dressing and tossing everything together.
- Whisk or fork – helps blend the olive oil, lemon juice, and seasonings smoothly.
- Sharp knife – for trimming and slicing onions and herbs with ease.
- Cutting board – keeps your prep work safe and tidy.
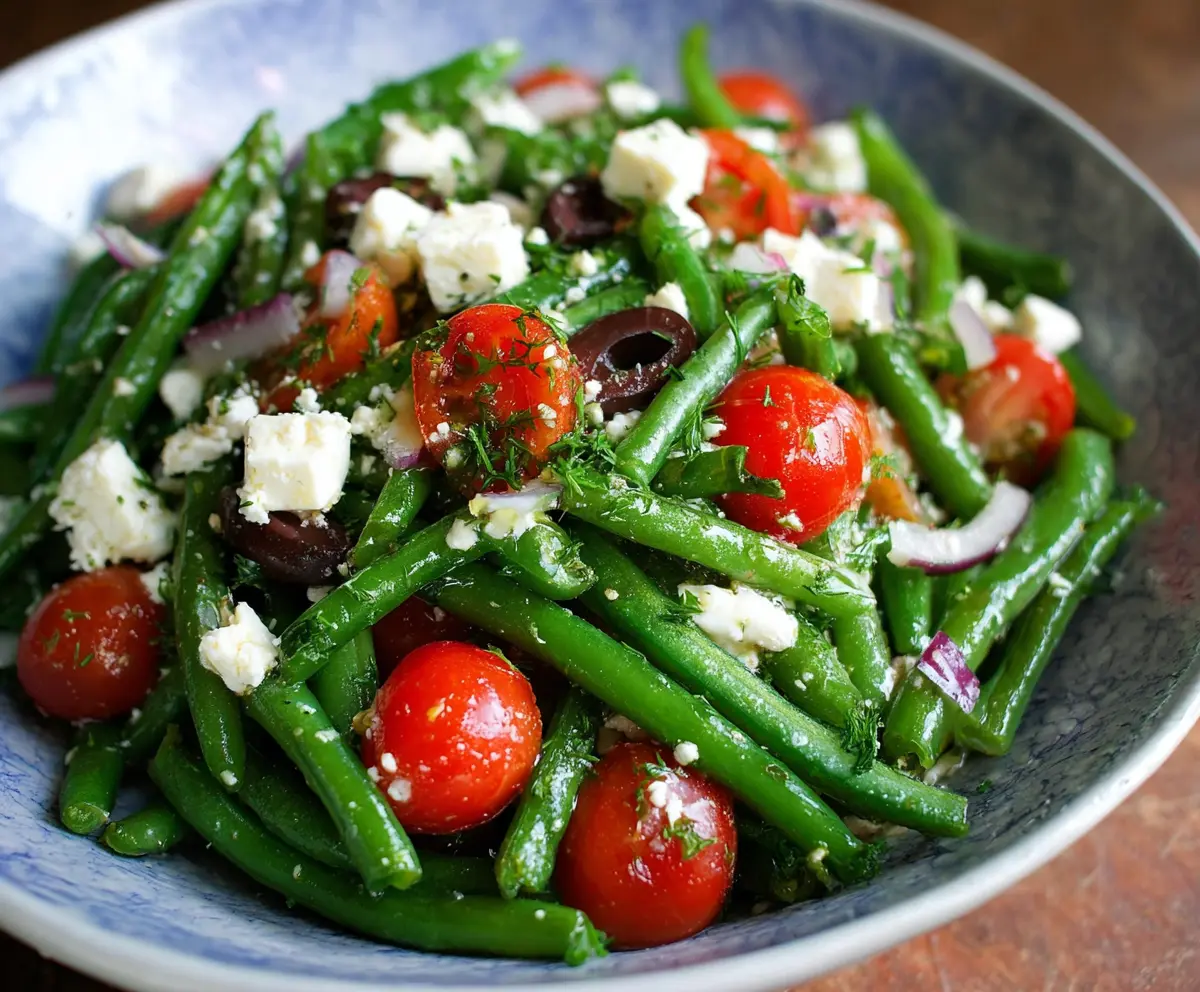
Flavor Variations & Add-Ins
- Switch feta for goat cheese or a vegan alternative for different creamy textures and flavors.
- Add in chopped tomatoes or roasted peppers for extra color and sweetness.
- Sprinkle with toasted pine nuts or walnuts for crunch and richness.
- Mix in fresh herbs like parsley, mint, or dill to vary the herb flavor depending on your mood or what you have on hand.
How to Make Green Bean and Feta Salad?
Ingredients You’ll Need:
Salad:
- 1 lb (450g) fresh green beans, trimmed and cut into 2-inch pieces
- 1/2 cup crumbled feta cheese
- 1/2 small red onion, thinly sliced
- 2 tablespoons fresh basil leaves, roughly chopped
Dressing:
- 1-2 tablespoons olive oil
- 1 tablespoon lemon juice (freshly squeezed)
- 1 teaspoon Dijon mustard (optional)
- Salt and freshly ground black pepper, to taste
- Optional: 1 teaspoon za’atar or dried oregano for seasoning
How Much Time Will You Need?
This salad takes about 10-15 minutes from start to finish. The green beans are cooked quickly and then cooled, with just a few minutes to prepare the dressing and toss everything together. You can serve it right away or let it chill for 20-30 minutes to deepen the flavors.
Step-by-Step Instructions:
1. Cook the Green Beans:
Bring a large pot of salted water to a boil. Add the green beans and cook for 3-4 minutes until they are tender-crisp and bright green. Immediately drain the beans and plunge them into a bowl of ice water to stop the cooking and keep their color vibrant. Drain well when cool.
2. Make the Dressing:
In a large bowl, whisk together olive oil, lemon juice, Dijon mustard (if using), salt, and pepper until the dressing is smooth and combined.
3. Combine the Salad:
Add the cooled green beans, sliced red onion, and chopped basil to the bowl with the dressing. Toss gently to coat everything well. Then gently fold in the crumbled feta cheese and sprinkle with za’atar or dried oregano if you like.
4. Serve:
Taste and adjust the seasoning with extra salt and pepper if needed. Serve this salad right away for fresh crunch, or chill it in the fridge for 20-30 minutes if you prefer cooler flavors that have melded together. It’s perfect as a light side dish or a healthy lunch.
Can I Use Frozen Green Beans Instead of Fresh?
Yes, frozen green beans work well! Just thaw them completely and pat dry before using to avoid extra moisture in the salad.
How Long Can I Store Leftovers?
Store leftovers in an airtight container in the fridge for up to 2 days. The green beans might soften a bit over time, so it’s best enjoyed fresh or the next day.
Can I Make This Salad Ahead of Time?
Absolutely! Prepare everything a few hours ahead and refrigerate. Add the feta cheese just before serving to keep it from becoming soggy.
What Can I Substitute for Feta Cheese?
Goat cheese or ricotta salata are great alternatives. For a dairy-free option, try a vegan feta or simply omit the cheese and add extra herbs or nuts for flavor.