Nutritious Oreo Protein Balls are a fun and tasty way to satisfy your sweet tooth while keeping things healthy. These little bites bring together the classic chocolatey crunch of Oreos with a boost of protein, making them perfect for a snack or a quick pick-me-up. They’re chewy, a bit crunchy, and packed with flavor, all in a handy, bite-sized ball.
I love making these when I need something quick and satisfying that feels like a treat but gives me some energy too. A little tip is to use crushed Oreos mixed with your favorite protein powder and a binding ingredient like nut butter or Greek yogurt to keep everything together. They come together in just a few minutes, so they’re great for when you’re short on time but don’t want to compromise on taste or nutrition.
These protein balls are perfect to pack for your day, toss in your kids’ lunchboxes, or have on hand after a workout. I often find that they’re a hit at parties because they have that familiar Oreo flavor with a little extra goodness. Plus, they’re really fun to make with friends or family, especially when you get to roll the balls together with your hands!
Key Ingredients & Substitutions
Quick Oats: These add texture and fiber to the balls. If you don’t have quick oats, rolled oats work too! Just pulse them a few times in a blender to get smaller bits for easier mixing.
Protein Powder: Choosing vanilla or chocolate flavors brings sweetness and richness. You can swap with plant-based protein like pea or rice protein if preferred. Just pick one with mild flavor to blend well.
Oreo Cookies: The star for that classic cookie crunch and flavor. Use regular or reduced-fat versions. For a twist, try chocolate sandwich cookies with different fillings or gluten-free ones based on your needs.
Almond Butter: This helps bind everything and adds healthy fats. You can substitute with peanut, cashew, sunflower, or tahini if you want a different nutty flavor or need a nut-free option.
Honey or Maple Syrup: Adds sweetness and helps hold the mixture together. Agave nectar or brown rice syrup can be used if you want a different natural sweetener or follow specific diet requirements.
How Do I Get the Perfect Dough Consistency Without It Crumbling or Too Sticky?
The mixture needs to be just sticky enough to hold together but not too wet. Start mixing your dry ingredients well, then add wet ingredients gradually. Here’s how I do it:
- Mix dry first: oats, protein powder, crushed Oreos.
- Add almond butter and sweetener, stir to combine.
- Pour milk slowly, one teaspoon at a time, mixing as you go. Stop once the dough pulls together but isn’t sticky on your fingers.
- If the dough feels crumbly, add a bit more milk or nut butter. If too sticky, add a small amount of oats or protein powder.
Using your hands to feel the dough helps you adjust perfectly. After shaping the balls, chilling them firms them up so they hold their shape and don’t fall apart when you eat.
Equipment You’ll Need
- Mixing bowl – I recommend a large one to easily combine all ingredients without mess.
- Measuring cups and spoons – for accuracy in ingredients like oats, honey, and milk.
- Food processor or blender (optional) – makes crushing Oreos and blending ingredients quick and uniform.
- Cookie scoop or tablespoon – helps form evenly sized balls for consistent texture.
- Tray or plate – for placing the balls while they chill in the fridge.
- Wax paper or parchment paper – prevents sticking and makes cleanup easy.
Flavor Variations & Add-Ins
- Use peanut butter instead of almond butter for a richer, nuttier flavor.
- Mix in mini chocolate chips or chopped nuts for extra crunch and texture.
- Swirl in a tablespoon of cocoa powder to intensify the chocolate flavor.
- Roll the balls in crushed nuts, cacao nibs, or sprinkles for a decorative and tasty coating.
Nutritious Oreo Protein Balls
Ingredients You’ll Need:
Main Ingredients:
- 1 cup quick oats
- 1/2 cup vanilla or chocolate protein powder
- 6 Oreo cookies, crushed (regular or reduced-fat)
- 1/4 cup almond butter (or any nut/seed butter)
- 2 tbsp honey or maple syrup
- 1/4 cup milk (dairy or plant-based), plus more if needed
- 1/2 tsp vanilla extract
Optional Ingredients:
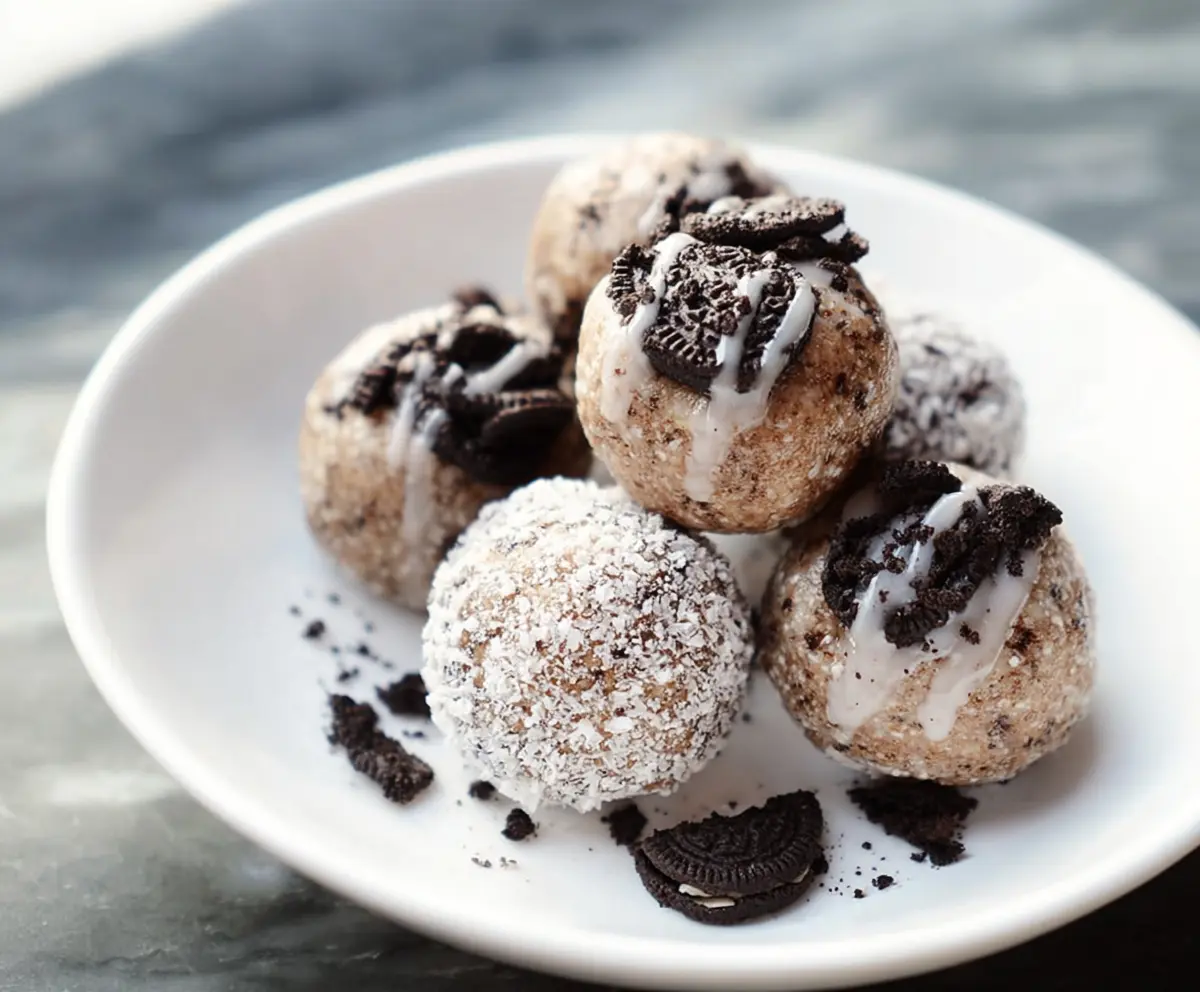
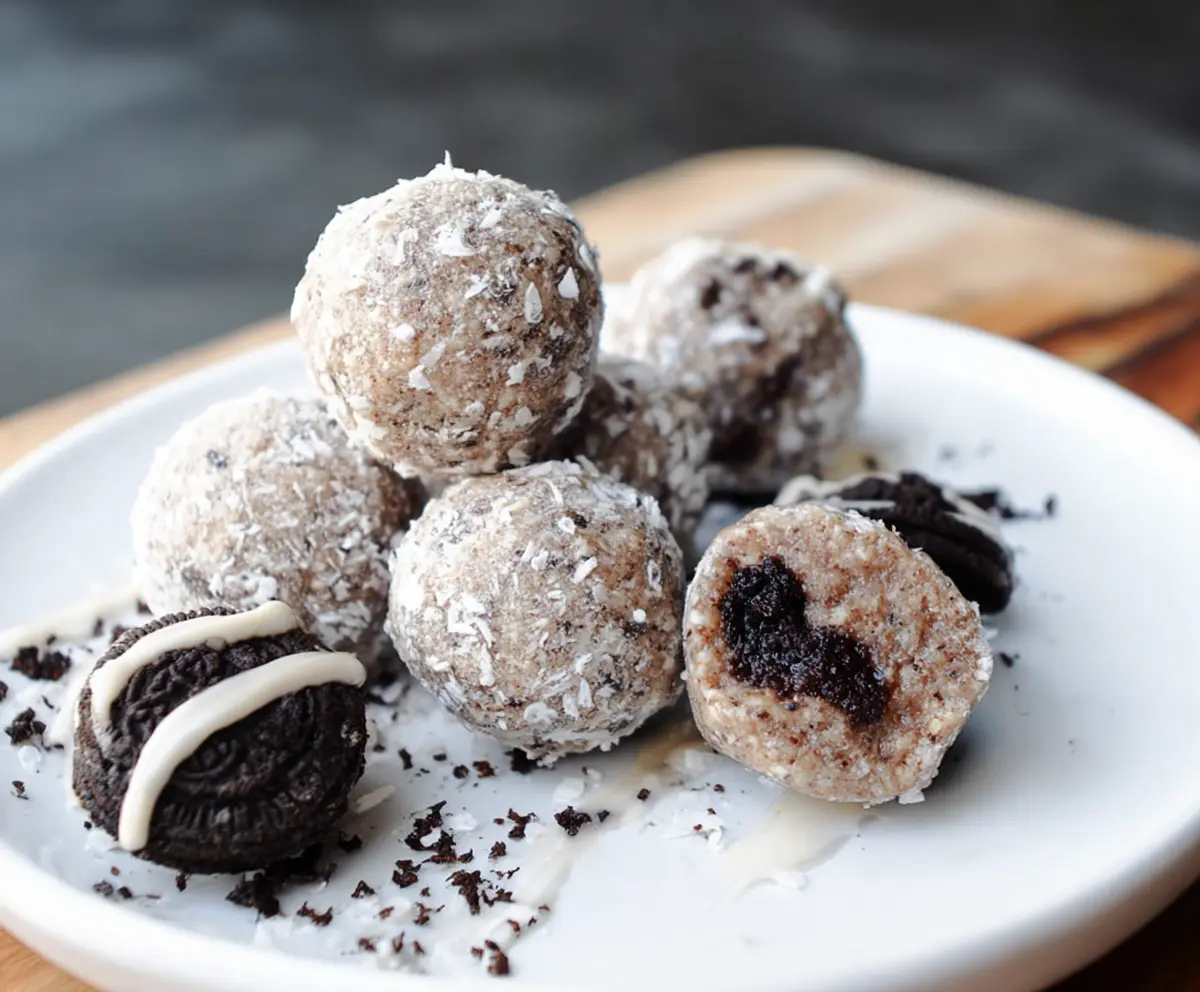
- 2 tbsp shredded coconut (for rolling)
- Additional crushed Oreos (for garnish)
- Icing or glaze (for drizzle)
How Much Time Will You Need?
This recipe takes about 10 minutes to prepare, plus a minimum of 30 minutes to chill in the fridge so the balls can firm up nicely. They’re quick to make and perfect for a grab-and-go snack!
Step-by-Step Instructions:
1. Mix Dry Ingredients:
Start by putting your quick oats, protein powder, and crushed Oreo cookies into a large bowl. Stir them together so they’re well combined.
2. Add Wet Ingredients:
Next, add your almond butter, honey or maple syrup, vanilla extract, and milk to the bowl. Mix everything well until a sticky dough forms. If it feels too dry, add a little more milk, one teaspoon at a time, until it’s easy to work with.
3. Form the Balls:
Roll the mixture between your hands to make small balls about 1 to 1.5 inches wide. If you’d like, roll some of the balls in shredded coconut for a fun coating.
4. Add Finishing Touches and Chill:
Place the balls on a plate or tray. You can press extra crushed Oreos on top or drizzle a little icing or glaze for decoration. Then, pop them in the fridge for at least 30 minutes to firm up before eating.
5. Storage:
Keep your protein balls in an airtight container in the fridge. They’ll stay fresh for up to one week, perfect for quick snacks any time you need them.
Can I Use Frozen Oreos for This Recipe?
Yes, you can use frozen Oreos, but make sure they are fully thawed before crushing. Thaw them at room temperature for about 30 minutes to avoid clumping and to ensure even mixing.
What Can I Substitute for Almond Butter?
Feel free to use peanut butter, cashew butter, sunflower seed butter, or tahini as alternatives. Just choose one with a similar consistency to help bind the mixture properly.
How Should I Store Leftover Protein Balls?
Store any leftovers in an airtight container in the fridge for up to one week. For longer storage, you can freeze them for up to three months—just thaw in the fridge before eating.
Can I Make These Protein Balls Ahead of Time?
Absolutely! Prepare the balls a day or two in advance and keep them chilled in the fridge. They actually taste better after a few hours as the flavors meld together.