Pineapple Coconut Sunshine Trifle Cups are a bright and cheerful dessert that brings together sweet pineapple, creamy coconut, and fluffy layers of cake or biscuit. These little cups have a perfect mix of juicy fruit, smooth coconut cream, and soft, spongy cake that makes every bite feel like a tiny tropical getaway.
I love making these trifle cups for summer gatherings or just when I want to brighten up an ordinary day. The best part is how easy they are to assemble but still look fancy and inviting. I like to add a sprinkle of toasted coconut on top for a little extra crunch and to bring out that coconut flavor even more.
Serving these in individual cups is a fun way to share with friends and family, and it saves me from having to cut and slice anything. Plus, they’re perfect for picnic baskets or potlucks because they’re portable and don’t make a mess. Whenever I make these, I can’t help smiling—there’s just something about the sweet, tropical flavors that feels like a little sunshine on a cloudy day.
Key Ingredients & Substitutions
Pineapple: Fresh pineapple gives a juicy and sweet flavor, but canned pineapple works great too. Just drain it well to avoid soggy layers. I like fresh for the best texture.
Coconut: I use shredded coconut for toasting and topping. Sweetened or unsweetened both work—sweetened adds more sugar, so adjust if needed. Toasting brings out a nutty flavor that’s really nice.
Cake: Angel food cake is light and airy, perfect for these trifles. You can also use pound cake or sponge cake. Gluten-free cake is a good swap for dietary needs, and store-bought cakes work well here.
Coconut Cream or Pudding: Coconut cream adds richness, but coconut-flavored pudding is a quick alternative. For a dairy-free option, use coconut whipped topping or a plant-based custard.
Whipping Cream: Heavy cream whipped with sugar creates light, fluffy layers. For a dairy-free version, try coconut whipping cream or another non-dairy substitute.
How Do I Toast Coconut Perfectly Without Burning It?
Toasting shredded coconut adds great flavor but can burn fast. Here’s how to get it right every time:
- Use a dry skillet over medium heat or melt a little butter for extra richness.
- Keep the coconut moving by stirring or shaking the pan often to toast evenly.
- Watch closely and remove from heat as soon as it turns golden brown. It can go from perfect to burnt in seconds!
- Let it cool—you’ll notice the coconut crisps up as it cools, giving a lovely crunchy texture to top your trifle.
Equipment You’ll Need
- Large skillet – I use it to toast the shredded coconut evenly and easily.
- Mixing bowls – for whipping cream and folding ingredients without spillage.
- Electric hand or stand mixer – makes whipping the cream quick and smooth.
- Serving glasses or cups – individual portions look prettier and are easy to serve.
- Spatula – for gently folding whipped cream and coconut pudding without losing air.
Flavor Variations & Add-Ins
Stir in chopped macadamia nuts or toasted almonds for extra crunch. You can also add a splash of rum or coconut liqueur to soak the cake for a boozy twist. For more flavor, include shredded mango or banana layers for added fruitiness.
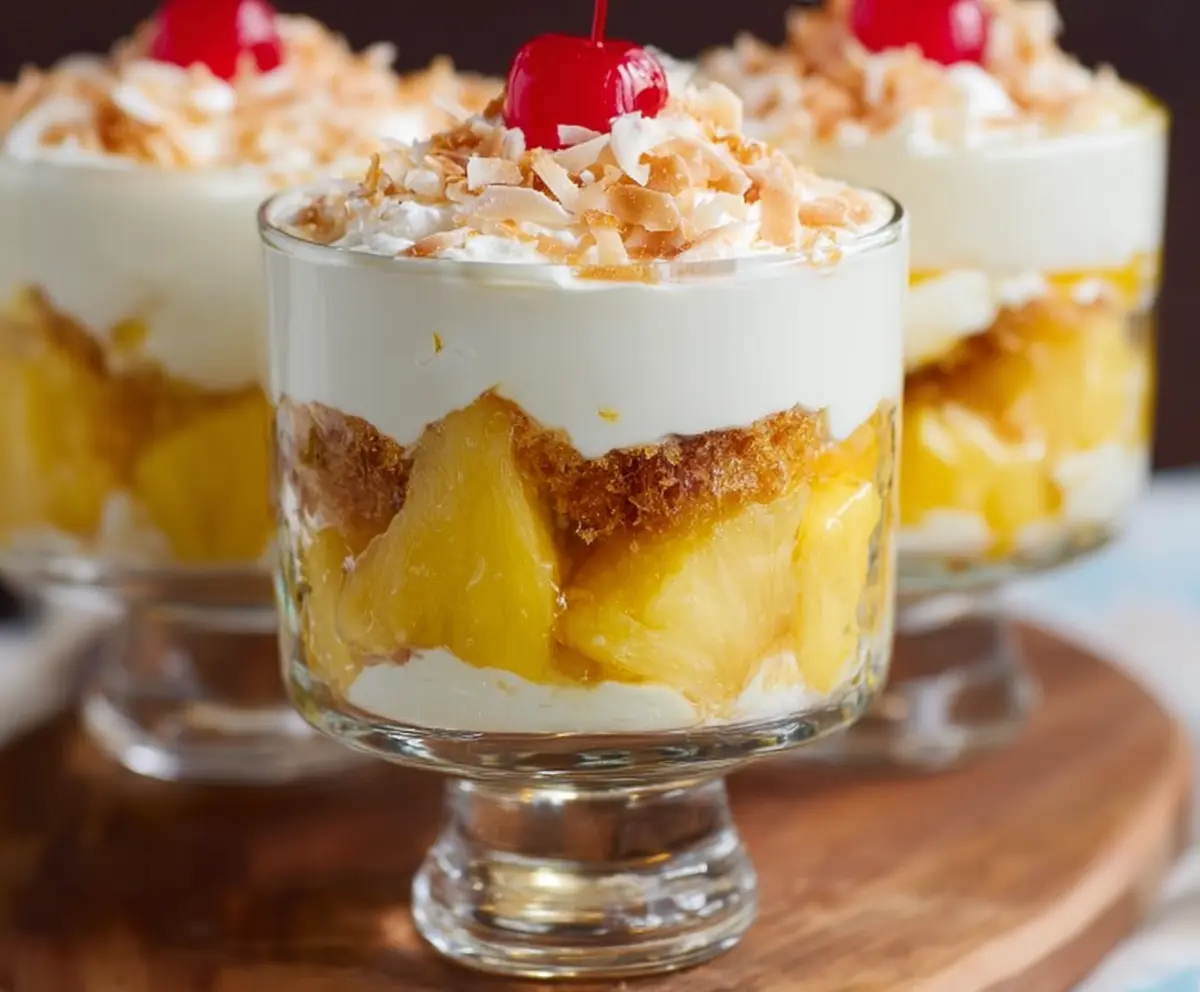
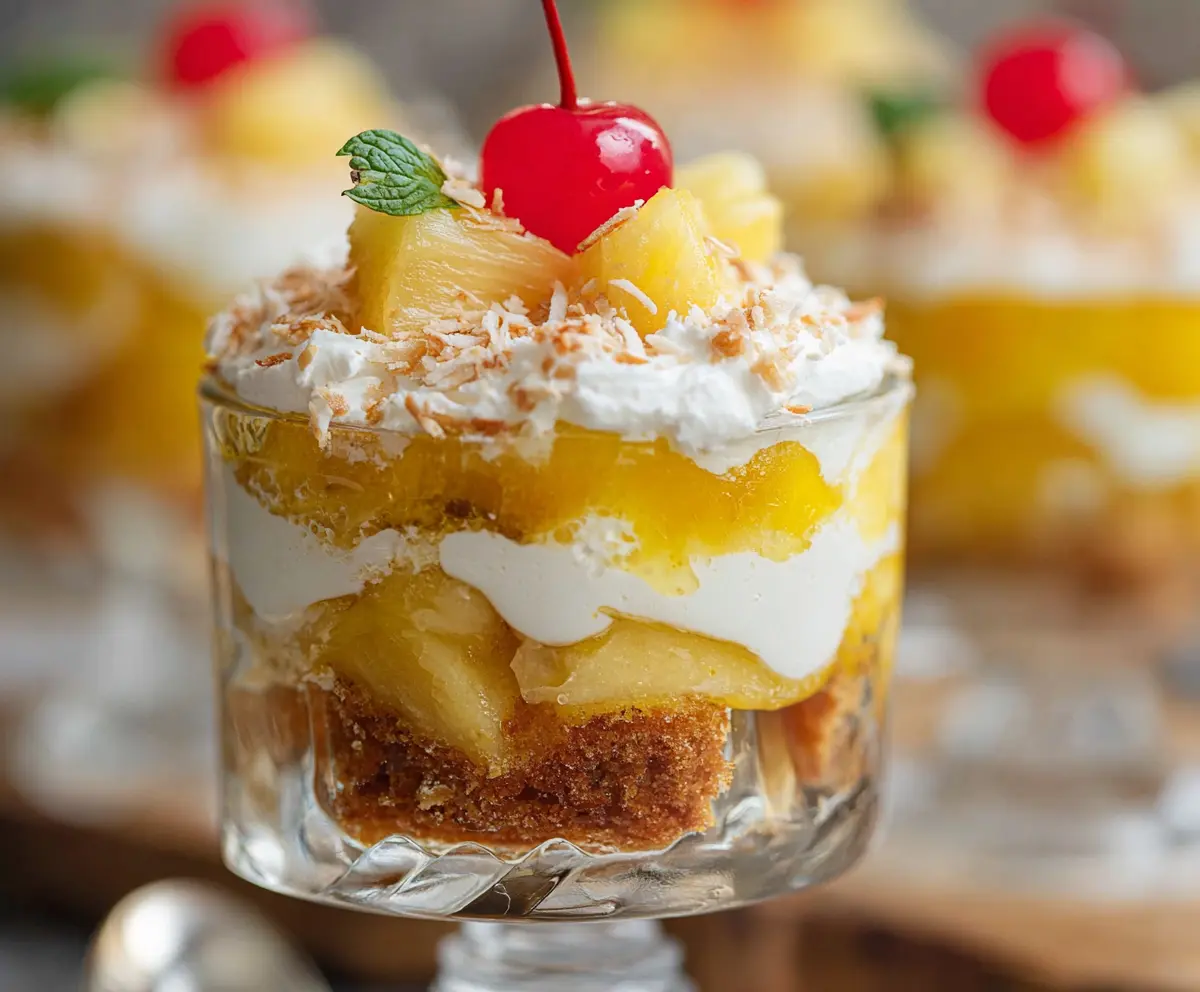
Pineapple Coconut Sunshine Trifle Cups
Ingredients You’ll Need:
For the Fruit & Cake Layers:
- 2 cups fresh pineapple chunks (or canned, drained)
- 4 slices of angel food cake or pound cake, cut into small cubes
For the Coconut Cream:
- 1 cup heavy whipping cream
- ¼ cup powdered sugar
- 1 teaspoon vanilla extract
- 1 cup coconut cream or coconut-flavored pudding
For Toasting and Topping:
- 1 cup shredded coconut (sweetened or unsweetened)
- 1 tablespoon butter
- ¼ cup toasted coconut flakes (for garnish)
- Maraschino cherries (for garnish)
How Much Time Will You Need?
This dessert takes about 15 minutes of prep time and about 1 hour of chilling to let the flavors meld and the layers set nicely before enjoying.
Step-by-Step Instructions:
1. Toast the Shredded Coconut
Heat the butter in a skillet over medium heat. Add the shredded coconut and stir often, cooking for about 5 minutes or until the coconut becomes golden and smells fragrant. Remove from heat and let it cool.
2. Make the Whipped Coconut Cream
In a cold bowl, whip the heavy cream with powdered sugar and vanilla extract until stiff peaks form. Gently fold in the coconut cream or pudding until all mixed together smoothly.
3. Build the Trifle Cups
Start by adding a layer of the whipped coconut cream to the bottom of each serving glass. Next, place a layer of pineapple chunks, pressing them slightly against the glass for a pretty look. Then add a layer of cake cubes that will soak up the juicy flavors. Repeat the layering, finishing with a final layer of whipped coconut cream on top.
4. Garnish and Chill
Sprinkle toasted coconut flakes generously on top of each cup. Add a maraschino cherry on the very top for a pop of color and sweetness. Refrigerate the trifle cups for at least an hour before serving to let all the flavors blend beautifully.
Enjoy your bright and tasty Pineapple Coconut Sunshine Trifle Cups! They’re perfect for warm days, parties, or anytime you want a little tropical sweetness.
Can I Use Canned Pineapple Instead of Fresh?
Yes, canned pineapple works well! Just be sure to drain it thoroughly to avoid making the trifle too watery.
How Long Can I Store the Trifle Cups?
You can keep the trifle cups covered in the fridge for up to 2 days. The cake may soften a bit, but the flavors will continue to meld deliciously.
Can I Make These Dairy-Free?
Absolutely! Substitute the heavy cream with coconut whipping cream or another plant-based alternative, and use dairy-free coconut pudding or coconut cream.
What’s the Best Way to Toast Coconut Without Burning It?
Toast the shredded coconut in a dry skillet over medium heat, stirring constantly. Remove from heat as soon as it turns golden brown to prevent burning.