Sourdough Discard Waffles are a fun and tasty way to use up leftover sourdough starter that might otherwise go to waste. These waffles come out light and crispy on the outside with a tender, slightly tangy inside, thanks to the sourdough. They’re a simple twist on classic waffles but with that extra bit of flavor and texture that sourdough brings.
I really love making these waffles because they feel like a little kitchen win—turning something that usually gets tossed into a compost bin into a delicious breakfast treat. Plus, the sourdough adds a nice depth that you don’t get with regular waffles. I like to add a bit of vanilla or cinnamon to the batter for a bit more warmth, and it always smells amazing cooking up.
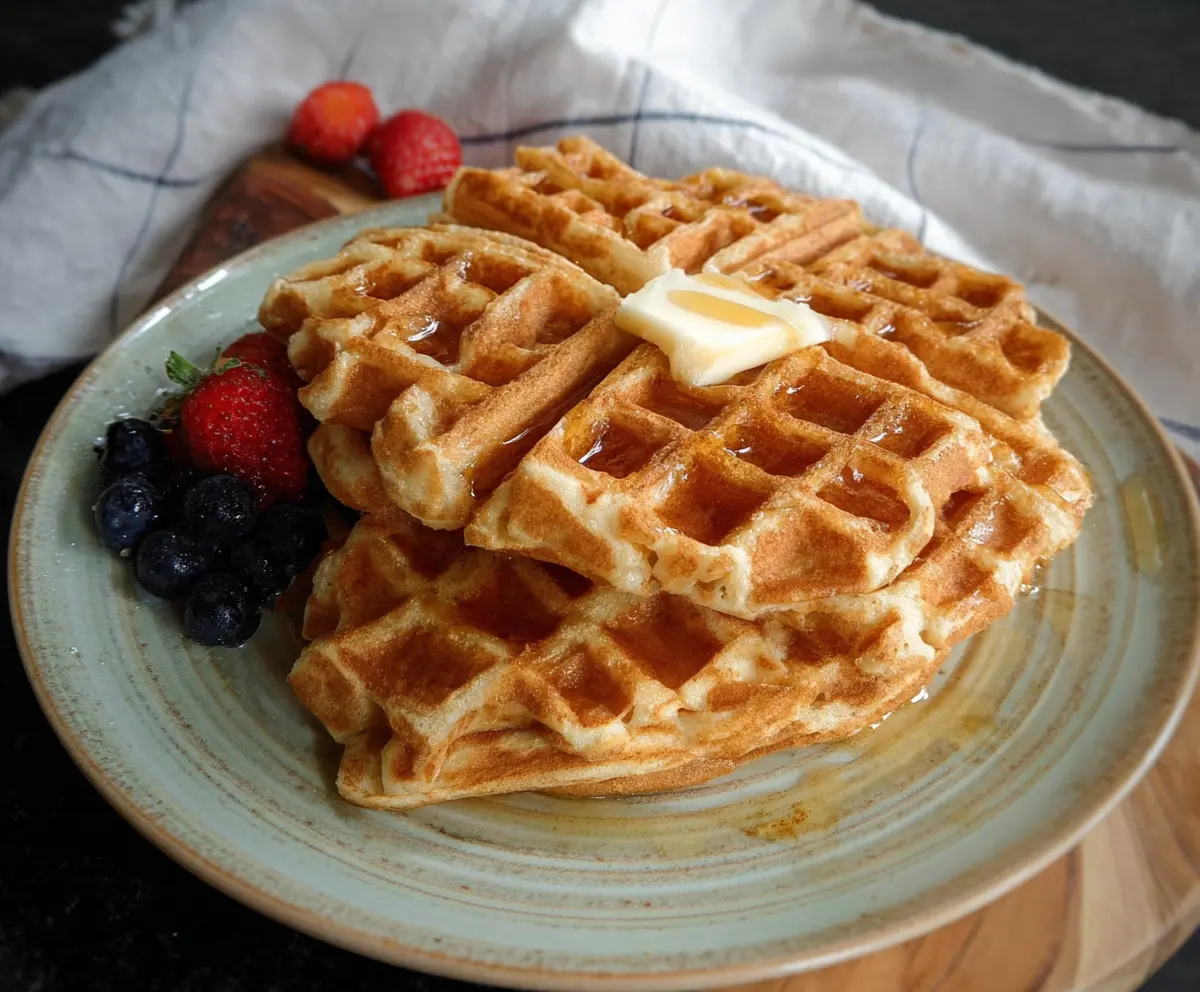
My favorite way to serve these waffles is with fresh fruit and a drizzle of honey or maple syrup. Sometimes I’ll even add a dollop of yogurt or a pat of butter to make them extra cozy. These waffles are perfect for a weekend morning when you want something special but not complicated. They’ve become a real favorite in our home because they’re both easy and full of flavor.
Key Ingredients & Substitutions
Sourdough starter discard: This is the star of the recipe! It adds a subtle tang and gives the waffles a nice texture. If you don’t have sourdough discard, you can try adding a tablespoon of vinegar or lemon juice for some acidity, but the flavor won’t be quite the same.
Flour: All-purpose flour works great here. You can substitute with whole wheat flour for a nuttier taste, but expect the waffles to be a bit denser.
Milk: Whole milk gives a rich batter, but you can use any milk you prefer—including plant-based options like almond or oat milk.
Butter: Melted butter adds flavor and helps make the waffles crispy. You can swap for oil, like vegetable or coconut oil, if you want a dairy-free option.
Baking powder & baking soda: These leavening agents work together to make the waffles fluffy and light. Don’t skip either one!
How Do I Get My Waffles Crispy on the Outside but Soft Inside?
Achieving crispy yet fluffy waffles is all about batter and waffle iron heat.
- Preheat your waffle iron fully before cooking. A hot iron helps create that crisp golden crust.
- Don’t overmix the batter once you add the leavening. A few lumps are okay—overmixing can make waffles tough.
- Use melted butter or oil in the batter and brush the waffle iron with butter or spray before each batch to prevent sticking and encourage crispiness.
- Cook waffles until steam stops rising from the iron, often about 3-5 minutes, so they crisp up nicely without drying out.
- Keep cooked waffles warm on a wire rack instead of stacking them; this prevents sogginess.
Equipment You’ll Need
- Waffle iron – I recommend a good-quality waffle maker with adjustable browning. It makes all the difference for crispness and even cooking.
- Mixing bowls – Use a large bowl for whisking the batter; a medium one for mixing the eggs and sugar helps keep things tidy.
- Whisk or fork – A whisk helps blend the ingredients smoothly without lumps.
- Measuring cups and spoons – Precision is key to getting perfect waffles every time.
- Basting brush or spray – For greasing the waffle iron before each batch, which helps with sticking and crispiness.
Flavor Variations & Add-Ins
- Chocolate chips or chopped nuts – Stir them into the batter before cooking for extra texture and flavor.
- Cinnamon or nutmeg – Add 1/2 teaspoon for a warm, spicy touch that pairs well with fruit toppings.
- Bananas or berries – Mix sliced fruit into the batter for bursts of sweetness and color.
- Cheese – Fold in shredded cheddar or cream cheese for a savory twist, great with eggs and bacon.
Sourdough Discard Waffles
Ingredients You’ll Need:
- 1 cup sourdough starter discard (unfed)
- 1 cup all-purpose flour
- 1 cup milk (whole or any preferred milk)
- 2 large eggs
- 2 tablespoons granulated sugar
- 1/4 cup unsalted butter, melted (plus extra for waffle iron)
- 1 teaspoon baking powder
- 1/2 teaspoon baking soda
- 1/2 teaspoon salt
- 1 teaspoon vanilla extract (optional)
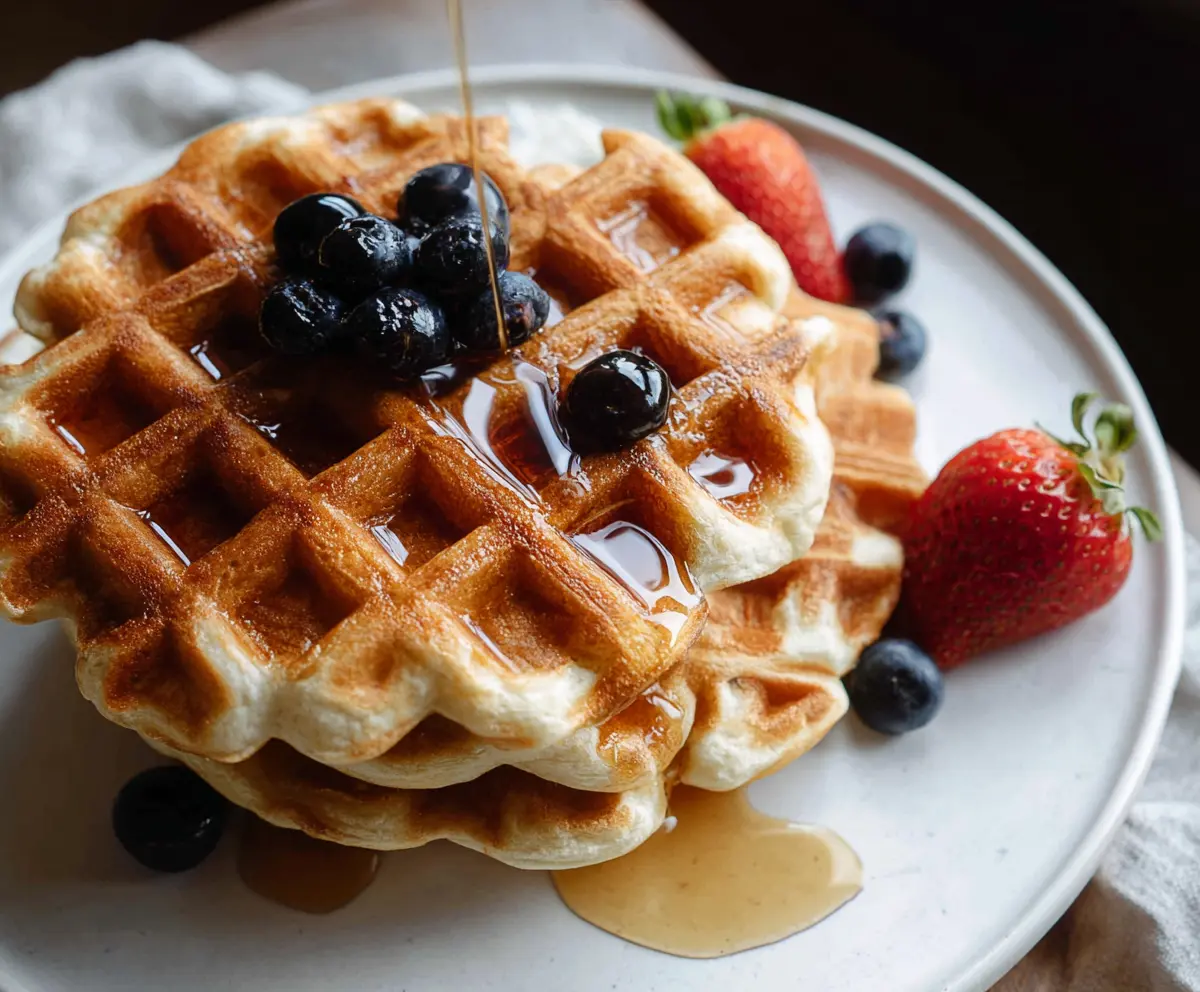
- Fresh blueberries and strawberries, for serving
- Maple syrup, for serving
How Much Time Will You Need?
This recipe takes about 10 minutes of prep time and roughly 15 minutes to cook the waffles, depending on your waffle iron. So in around 25 minutes, you’ll have a delicious batch of waffles ready to enjoy.
Step-by-Step Instructions:
1. Preheat and Prepare Your Waffle Iron:
Start by heating your waffle iron according to its instructions. Lightly grease it with butter or non-stick spray to make sure your waffles don’t stick.
2. Mix the Batter:
In a large bowl, whisk together the sourdough discard, flour, and milk until smooth. In a separate bowl, beat the eggs along with the sugar and vanilla extract if you’re using it. Stir these wet ingredients into the sourdough mixture.
3. Add Butter and Leavening:
Pour the melted butter into the batter and mix well. In a small bowl, combine the baking powder, baking soda, and salt. Sprinkle these dry ingredients over the batter and fold gently just until everything is combined – don’t overmix!
4. Cook the Waffles:
Pour an amount of batter into the hot waffle iron (usually about 1/2 to 3/4 cup, depending on your iron). Close the lid and cook for 3 to 5 minutes, or until the waffles turn golden brown and have a crispy exterior.
5. Serve and Enjoy:
Carefully remove the waffles and keep them warm while you cook the rest. Serve topped with fresh blueberries, strawberries, and a drizzle of maple syrup for a tasty breakfast treat.
Can I Use Frozen Sourdough Starter Discard?
Yes! Just make sure to thaw it in the refrigerator overnight and give it a good stir before using. This helps the ingredients incorporate smoothly in the batter.
Can I Substitute Milk with a Dairy-Free Alternative?
Absolutely! Almond, oat, or soy milk all work well in this recipe and won’t affect the texture much. Just use the same amount as the recipe calls for.
How Should I Store Leftover Waffles?
Let the waffles cool completely, then store them in an airtight container or zip-top bag in the fridge for up to 3 days. Reheat in a toaster or oven for best crispiness.
Can I Make the Batter Ahead of Time?
Yes, you can prepare the batter and refrigerate it for up to 8 hours. Give it a gentle stir before cooking, as the ingredients may settle.