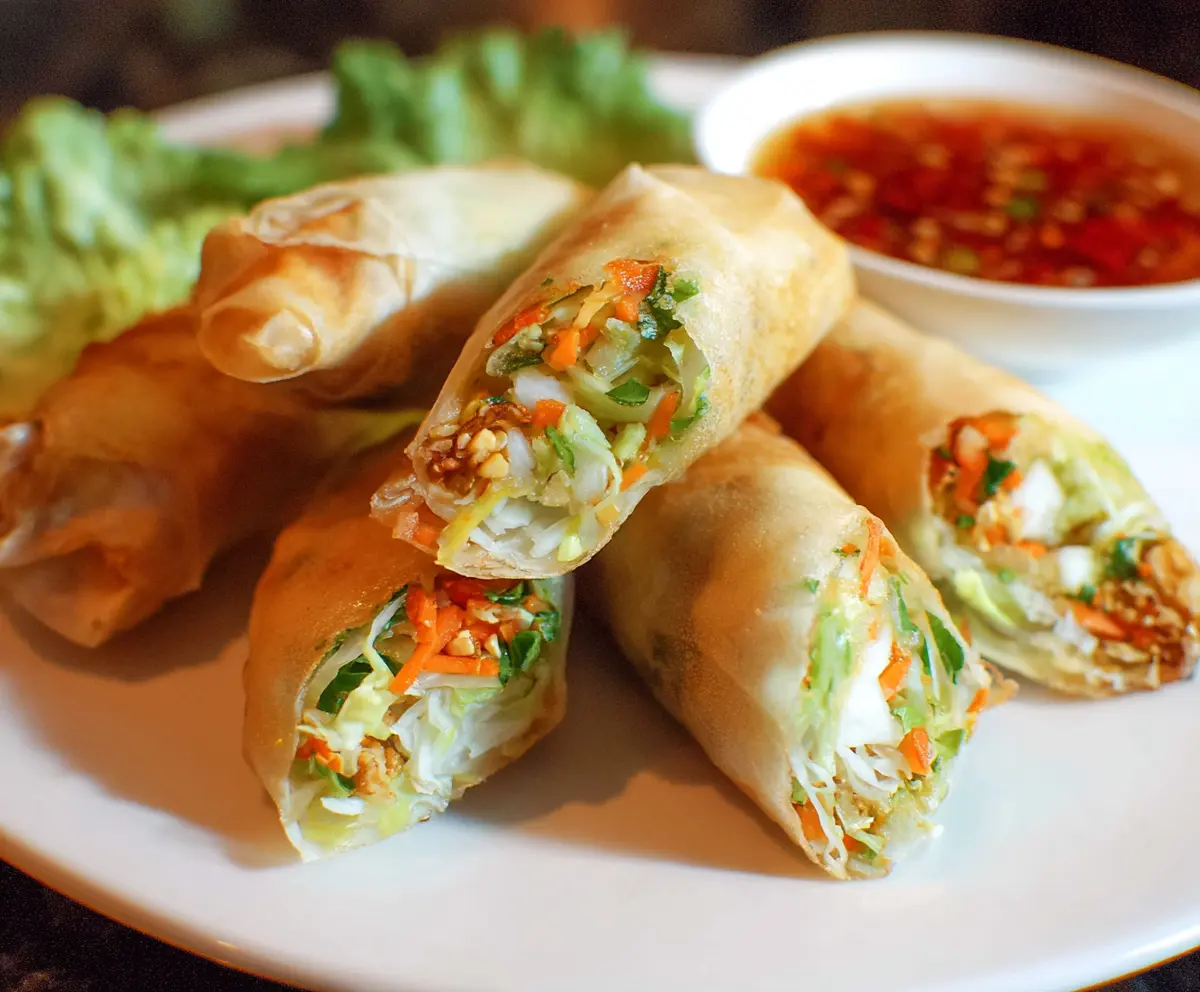
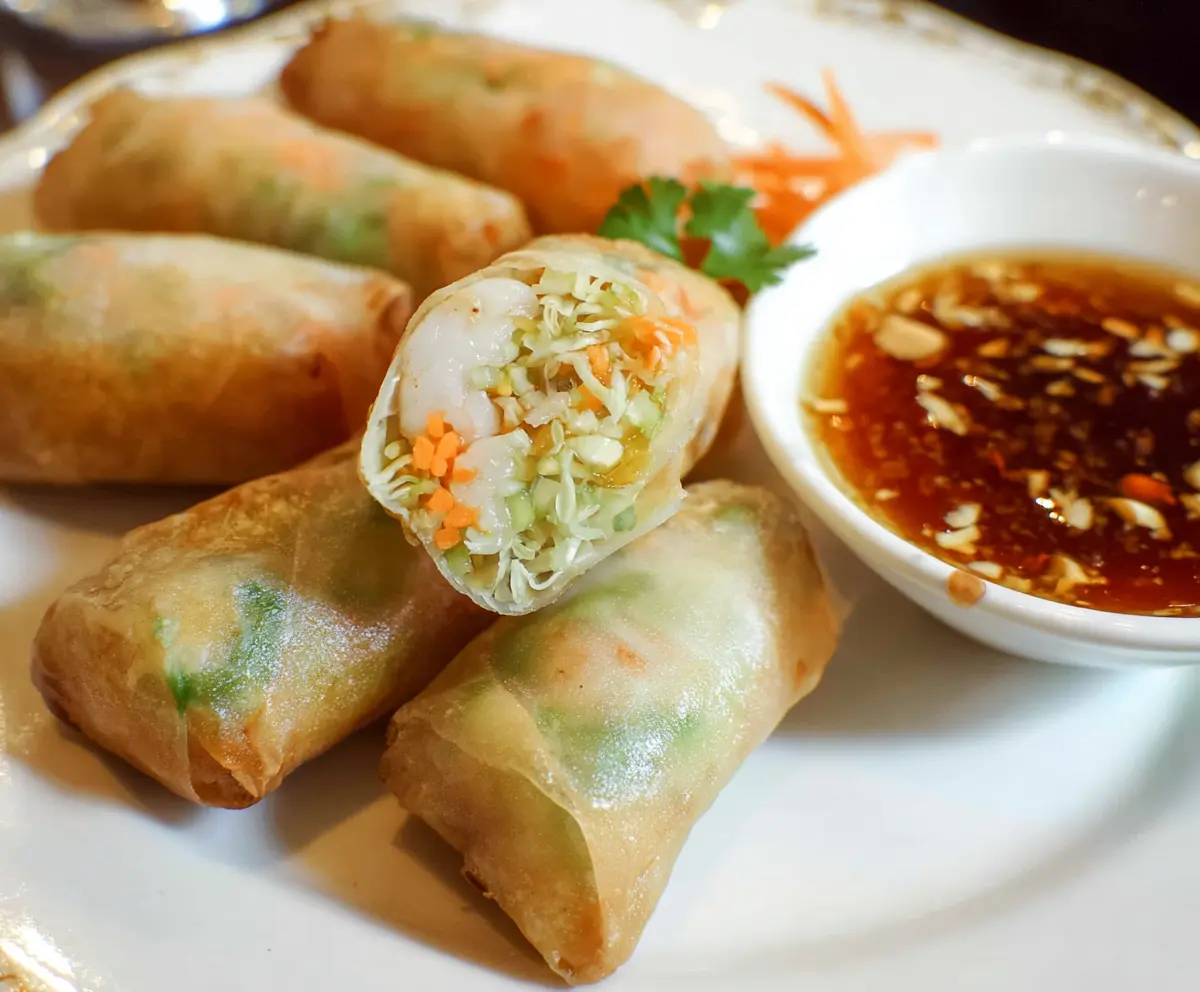
Thai spring rolls are fresh, crispy, and full of vibrant flavors. They typically pack a mix of crunchy veggies like carrots and cabbage, along with herbs like mint and cilantro, all wrapped up in delicate rice paper. Sometimes they’re filled with shrimp or tofu, making each bite a perfect balance of textures and tastes.
I love making these because they’re fun to assemble and everyone can customize their rolls just how they like. I like to have lots of dipping sauces on hand—sometimes a sweet chili sauce, sometimes a peanut sauce. It’s always a little adventure to find your favorite combo!
One of my favorite ways to enjoy Thai spring rolls is at a casual get-together, where everyone rolls their own and shares laughs over the process. They feel fresh and light but also satisfying, making them a great choice for a snack or a meal. Plus, they’re a great way to sneak in some extra veggies without even realizing it.
Key Ingredients & Substitutions
Spring Roll Wrappers: These provide the crispy, light shell. If you can’t find them, try using thin filo dough or even lettuce leaves for a fresh wrap version.
Vegetables: Cabbage, carrots, bean sprouts, and green onions give great crunch and freshness. Feel free to add shredded bell peppers or mushrooms if you like.
Herbs: Cilantro and mint add bright flavors. If you’re not a fan, basil or parsley can be a good substitute.
Protein: Cooked shrimp or shredded chicken are classic but optional. Tofu or cooked mushrooms work well for a vegetarian option.
Fish Sauce & Soy Sauce: Both add umami and depth. Use soy sauce only if you prefer a vegetarian or vegan sauce.
How Do I Wrap Thai Spring Rolls Without Them Falling Apart?
Wrapping the spring rolls tightly is key for crisp and neat rolls that hold together while frying.
- Lay the wrapper on a flat surface like a diamond shape.
- Place filling near the bottom third, leaving space at the edges.
- Fold the bottom edge over the filling.
- Fold in the left and right edges snugly.
- Roll up firmly but gently to keep filling inside.
- Seal the top edge with a dab of water to glue it closed.
A neat, tight roll helps prevent oil from seeping in and keeps the crispy texture. Practice makes perfect here!
Equipment You’ll Need
- Deep-fry thermometer – I find it helpful to keep the oil at the right temperature for crispy rolls.
- Large skillet or deep fryer – gives plenty of space to fry the rolls evenly and safely.
- Slotted spoon or tongs – makes turning and removing the rolls easier and less messy.
- Small bowl – for mixing the dipping sauce ingredients.
- Paper towels – to drain excess oil after frying.
Flavor Variations & Add-Ins
- Swap shrimp for cooked shredded chicken or tofu to make it vegetarian or suit your preference.
- Add thinly sliced bell peppers or cucumber inside for extra crunch and color.
- Use fresh Thai basil or cilantro instead of mint for a different herbal flavor.
- Spice up the dipping sauce with more chili or a squeeze of lime for different heat and tang levels.
Thai Spring Rolls
Ingredients You’ll Need:
For the Spring Rolls:
- 12 spring roll wrappers
- 2 cups shredded cabbage
- 1 cup shredded carrot
- 1 cup bean sprouts
- 1/2 cup thinly sliced green onions
- 1/4 cup chopped cilantro
- 1/4 cup chopped mint leaves (optional)
- 1/2 cup cooked shrimp or cooked shredded chicken (optional)
- 2 cloves garlic, minced
- 1 tablespoon soy sauce
- 1 teaspoon fish sauce
- 1 teaspoon sugar
- Vegetable oil for frying
For the Dipping Sauce:
- 1/4 cup rice vinegar
- 2 tablespoons sugar
- 1 tablespoon fish sauce
- 1 clove garlic, finely chopped
- 1 teaspoon red chili flakes or chopped fresh red chili
- 2 tablespoons water
How Much Time Will You Need?
It takes about 25 minutes to prepare and roll your spring rolls plus 10 minutes to fry them. Setting up the dipping sauce only takes a few minutes. Overall, you’ll spend around 35 minutes from start to finish.
Step-by-Step Instructions:
1. Prepare the Filling:
In a large bowl, mix together the shredded cabbage, carrot, bean sprouts, green onions, cilantro, and mint. If you like, add cooked shrimp or shredded chicken for protein.
In a small bowl, whisk the minced garlic, soy sauce, fish sauce, and sugar. Pour this flavor-packed dressing over the veggies and toss everything well. Let it sit while you get ready to roll.
2. Roll the Spring Rolls:
Place one spring roll wrapper flat on a clean surface. Spoon about 2 to 3 tablespoons of the filling near the edge closest to you.
Fold the bottom edge over the filling, then tuck in the sides tightly and roll up the wrapper to enclose the filling. Use a little water on the top edge to seal it tightly.
3. Fry the Rolls:
Heat vegetable oil in a deep skillet over medium-high heat until it reaches about 350°F (175°C). Carefully fry your rolls in batches, turning them occasionally, until golden brown and crispy—usually about 3 to 4 minutes per batch.
Remove the rolls with a slotted spoon and drain on paper towels.
4. Make the Dipping Sauce & Serve:
In a small bowl, combine rice vinegar, sugar, fish sauce, minced garlic, chili flakes, and water. Stir until the sugar dissolves and the sauce is well mixed.
Serve your hot spring rolls alongside the dipping sauce. Dip and enjoy!
Can I Use Frozen Shrimp or Chicken in the Filling?
Yes, you can! Just be sure to fully thaw the shrimp or chicken before using. Thaw them overnight in the fridge or quickly under cold running water in a sealed bag. Pat dry to remove excess moisture.
Can I Bake Instead of Frying the Spring Rolls?
Absolutely! Brush the rolls lightly with oil and bake in a preheated oven at 400°F (200°C) for 15-20 minutes until crispy and golden, turning halfway through. This is a healthier alternative but won’t be quite as crispy as frying.
How Should I Store Leftover Spring Rolls?
Allow any leftover spring rolls to cool completely, then store them in an airtight container in the fridge for up to 2 days. To reheat, bake in the oven for a few minutes to regain crispiness or warm in a skillet.
Can I Customize the Filling?
Definitely! Feel free to add other veggies like bell peppers, mushrooms, or cucumbers. You can also swap proteins or make them fully vegetarian by using tofu or just veggies and herbs.